.svg)
.svg)
.svg)
.svg)
.svg)
Picking the correct violin size isn’t just about comfort. It’s about setting up every student, whether a 5-year-old beginner or an adult hobbyist, for long-term success.
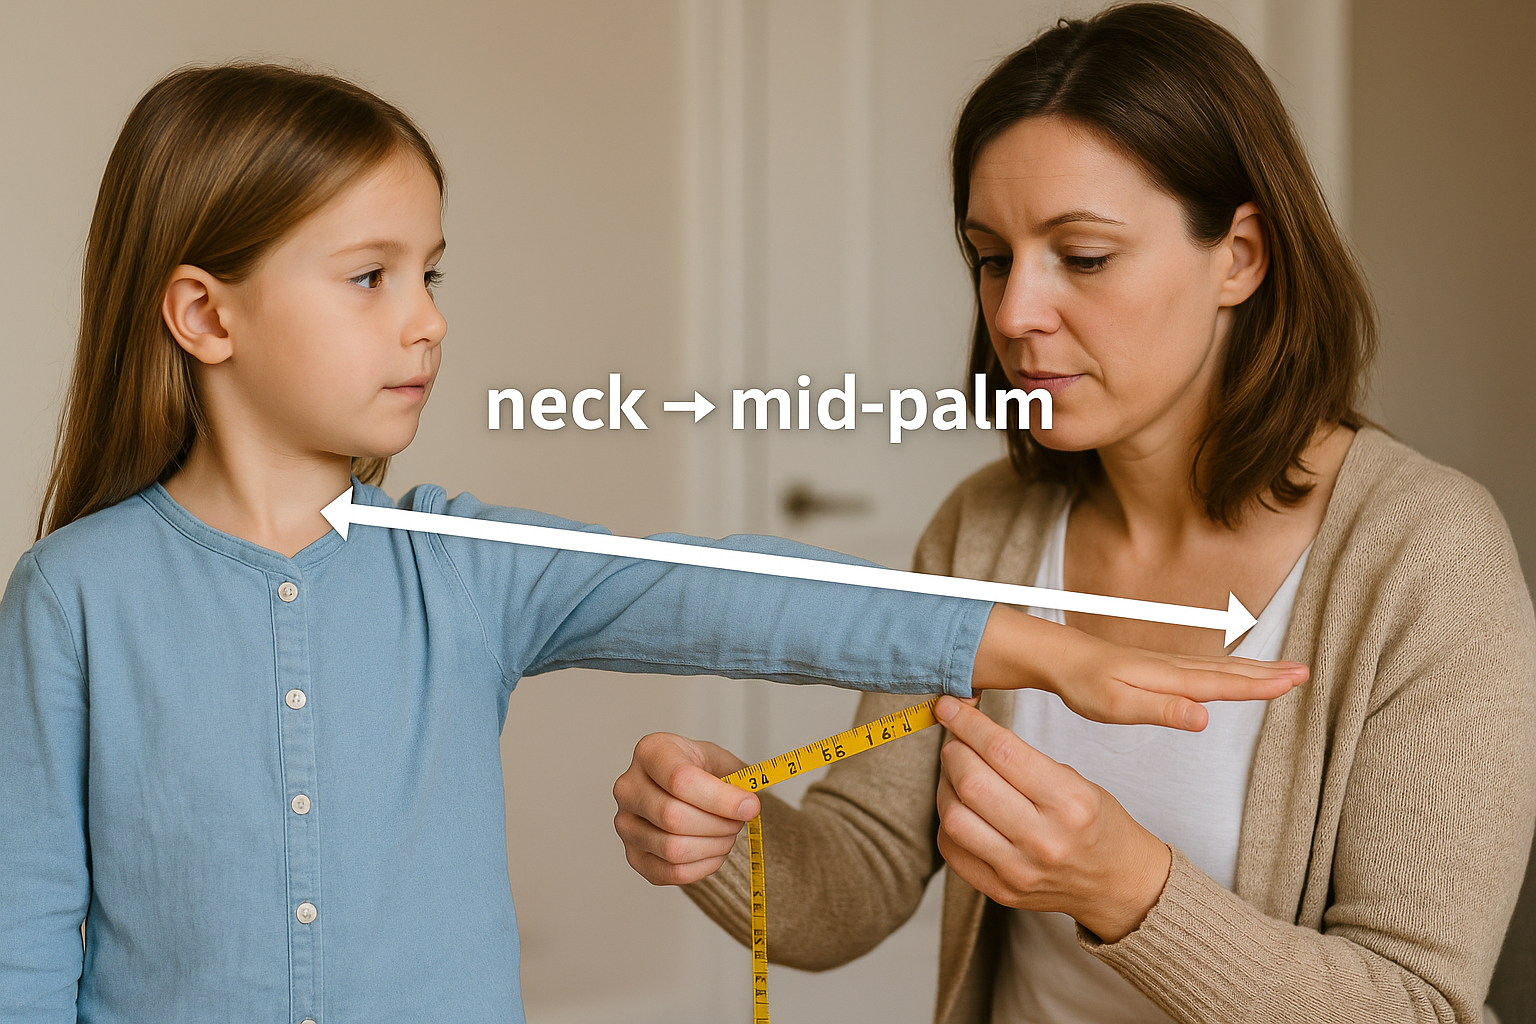
In my studio, I size every student the same simple way: left arm out, palm up, measure from the base of the neck to the middle of the palm, then match that number to a violin size chart.
Do this right and you get comfort, clean intonation, and a kid (or adult) who actually wants to practice. Do it wrong and you get sore shoulders, “sloppy” pitch, and a fast track to “Mom, violin isn’t for me.”
Before we start…
Here’s something most people get backward: many students want to buy a violin first and then sign up for lessons. But honestly? It’s smarter the other way around.
At Angeles Academy, we let new students start their first class with a borrowed instrument. No obligation, no long-term contract. This way, your teacher can check your arm length, posture, and comfort in real time, then guide you toward the right size and instrument before you spend a dime.
Think of it as a test drive before buying. One short lesson can save weeks of guesswork (and a few hundred dollars). Now, let’s look at the violin size chart and find your perfect fit.
The measurement (and the two sanity checks)
Here’s how I walk families through it in lessons.
Stand tall, lift the left arm to the side as you would hold the instrument (not straight in front), palm facing the ceiling, fingers extended. Run a tape from the base of the neck to the middle of the palm. That number drives everything for selecting the right size .
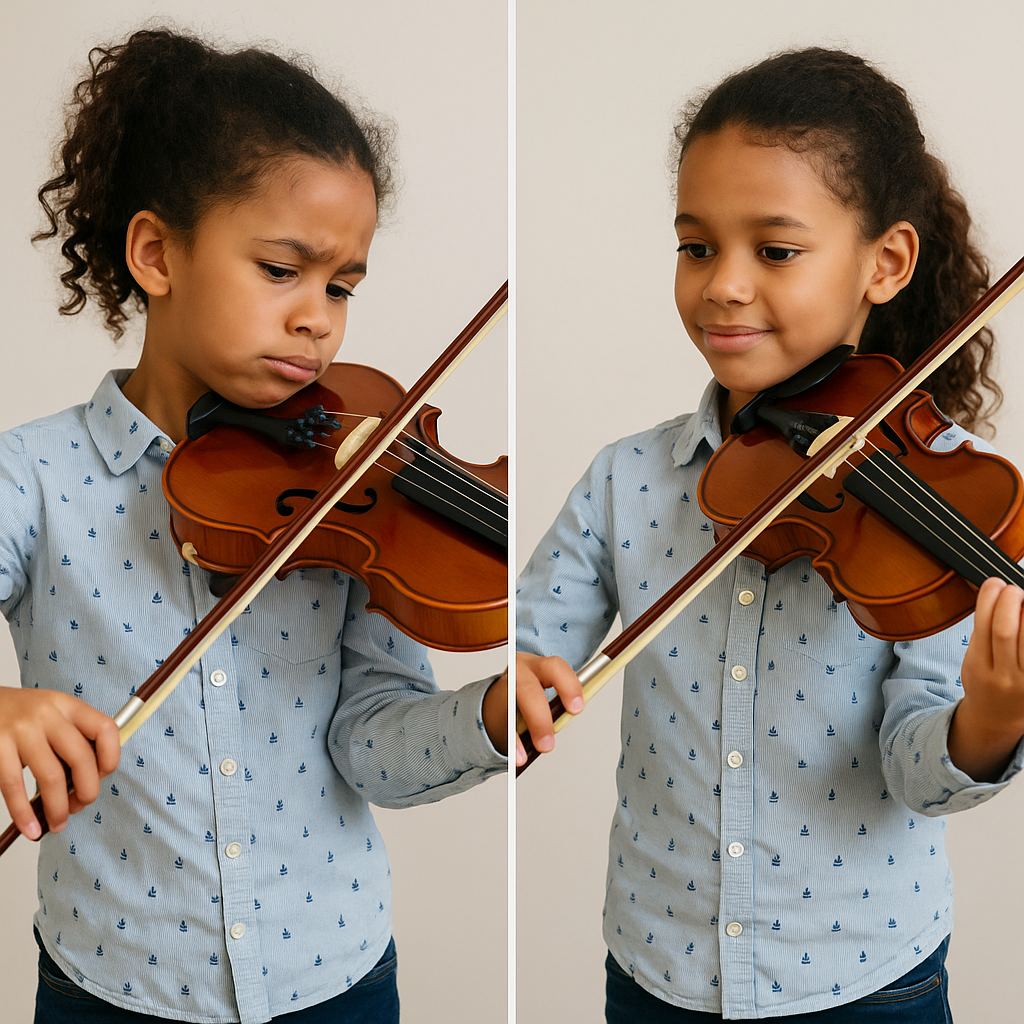
Then I add two reality checks with an actual violin. First, the scroll reach: place the violin on the shoulder and gently cup the palm around the scroll. If you need to lock the elbow straight to reach, the violin is too big.
If your arm is cramped to a right angle, it’s too small. Second, the comfort scan: breathe, drop the shoulders, and notice whether your neck is subtly hiking or your wrist is collapsing. If “comfortable” requires acrobatics, we change the size, or sometimes just the shoulder rest height.
And the rule that saves 80% of headaches: if you’re between sizes, choose the smaller one. Buying big to “grow into” almost always means growing into bad habits.
A slightly smaller violin lets the left hand shape correctly, keeps the elbow free, and protects motivation.
So, in summary…
How to measure violin size?(Parents and Students Can Try This at Home):
- Stretch out the left arm, palm facing upward, parallel to the floor.
- Measure from the base of the neck (collarbone) to the middle of the palm (not fingertips).
- Compare this measurement (in inches or centimeters) to the violin size chart below.
Violin Size Chart (quick reference you can screenshot)
Age helps, but arm length wins. Use ranges; makers vary a little.
.webp)
A note on very small instruments: 1/16 and 1/32 can sound thin, no matter what. Tiny bodies, tiny sound. If your four-year-old can safely handle 1/10 or 1/8, I’ll often choose the one that keeps posture easy and tone less squeaky. Comfort first; beautiful sound follows when the setup fits the body.
If you want a zero-guesswork fitting, my team and I are happy to help. Given, you’re in Los Angeles and are looking for violin lesson near you, book a spot for violin lessons in Los Angeles, at Angeles Academy of Music.
In our lessons, we’ll measure, match the violin size, and get the first notes ringing the same day.
Parents: the straight talk (from someone who’s sized a lot of tiny violinists)
Re-measure after growth spurts. Kids can jump a size in a semester. When in doubt, smaller wins the tie; you’ll trade up soon enough. Expect the earliest instruments to sound modest; that’s normal.
What isn’t normal is tension: elevated shoulders, a collapsing left wrist, or a child leaning away from the instrument. That’s a sizing or setup issue, not a “my kid isn’t musical” problem.
This is also why renting is smart early on: it’s built for size swaps and lets us prioritize fit without committing to three purchases in two years. A good rental shop (or our front desk) will also help with the shoulder rest height and chinrest style, which can transform “this feels awkward” into “oh, that’s better” in sixty seconds.
If you’d like the bigger “why” behind starting now, these are helpful reads to share at home: Boost Your Children’s Academic Achievement Through Music Education and The Long-Term Value of Music Education for Children and Adults. Music doesn’t just make better musicians; it builds attention, memory, and confidence.
Adult beginners: comfort outruns ego
Most adults land in full size violin (4/4). But if you’ve got a shorter reach or a touchy neck/shoulder, try a 7/8. It’s not “training wheels,” it’s ergonomics. A relaxed left hand learns faster than a tense one.
The pinky that feels impossible on day one? That’s normal across ages; positioning and a few weeks of smart reps change everything. Find adult violin lessons near you, and ask to test both sizes at your first lesson. You’ll feel the difference in the first minute of a slow scale.
Also: you’re not “late.” You’re right on time. Playing an instrument is one of the most effective ways I’ve seen adults keep their brains sharp and moods steady. If you want some inspiration, skim the Benefits of Music Education at Every Age.
Common pitfalls (and how we fix them fast)
Sizing by age alone is the classic trap. Two nine-year-olds can be a 1/2 and a 3/4 on the same day. Measure the arm, then verify on the shoulder with the scroll-reach test. Another pitfall: “We bought the bigger one so we don’t have to buy again.”
I get it; I also see the fallout: overstretching, inconsistent pitch, a student who thinks they’re “bad at violin” when they’re just fighting a plank. Finally, don’t ignore setup: a shoulder rest that’s too low/high can make a perfect-size violin feel wrong. Five millimeters of foam can sometimes save a whole semester.
Renting, buying, and the “what do I actually need?” question
My bias for kids is to rent first, size up as you grow, then buy when you’ve lived in the right size for a while.
If you’re in Los Angeles, you can rent from:
- Shar Music
- Metzler Violin Shop
- LA Violin Shop
- The Instrument Place
- Santa Monica Music Center
- Adam’s Music
When you do buy, prioritize a shop or brand known for proper setup: bridge, nut, pegs, strings, and soundpost all working like a team.
If you’re curious, you can learn more about how each part of a violin affects playability and sound, and why setup matters so much for beginners here.
Online “bargain bundles” are tempting, but if the bridge isn’t fitted or the strings are off-brand spaghetti, you’ll spend more fixing it.
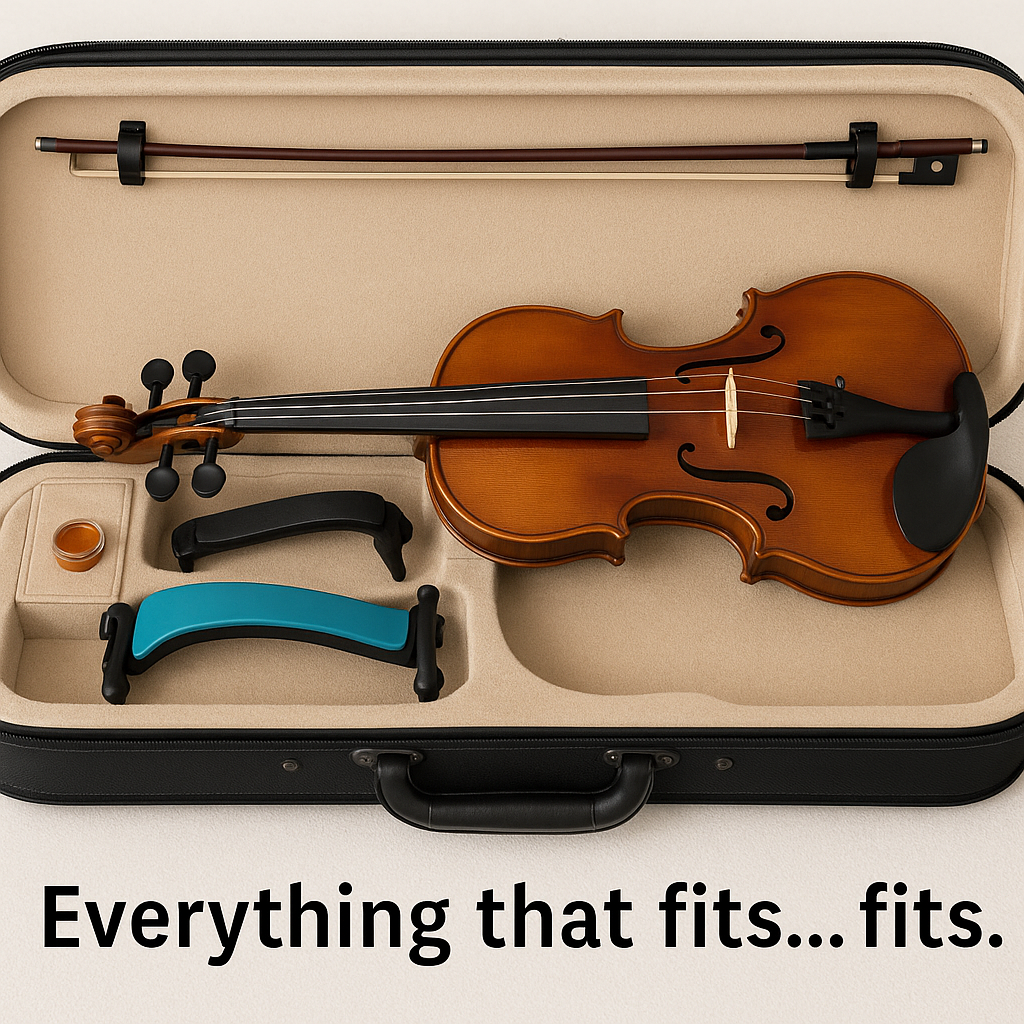
If you want names in passing (no sponsorships here): Kun and Wolf shoulder rests fit a lot of bodies; Everest is sturdy for kids; for a full-size violin case, I like reliable oblong or half-moon designs from Bobelock or lightweight composites like Bam. They actually protect the thing you just invested in. Keep it simple: violin, bow that matches the size, rest that fits the neck, rosin, cloth. That’s the starter kit.
Wrap-up (and your next small step)
Choosing the right violin sizes isn’t mystical; it’s a tape measure, a violin size chart, and ten seconds of common sense on the shoulder. Measure neck to mid-palm, confirm with the scroll reach, and when you’re torn, pick the smaller size.
That one decision protects posture, keeps pitch honest, and, most importantly, keeps the spark alive.
If you’re unsure where to start, the best first step is to sign up for a lesson with one of our expert violin instructors. During your very first class, we’ll measure your arm length, check your posture, and make sure you’re choosing the right violin size and setup before you buy or rent an instrument. It’s the easiest way to avoid mistakes and start off feeling confident.
Ready to begin? Join our violin classes at Angeles Academy of Music. We offer violin classes for kids, adults, and everyone in between.
So, how to size a violin the right way: measure neck to mid-palm, use our violin size chart.
.svg)
.webp)


.svg)